
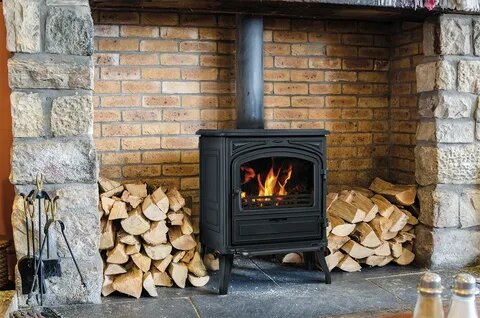
A chimney cap is an essential part of a wood-burning stove system that often goes overlooked. It plays a vital role in keeping your chimney functional, safe, and free from debris. Installing a chimney cap not only protects your chimney but also improves the efficiency of your stove. If you’re looking for a detailed guide on how to install a chimney cap for your wood-burning stove, this article will cover everything you need to know. We’ll also explain why it’s important and highlight some tips for safe and efficient installation.
If you’re searching for top-quality chimney caps and wood-burning stoves, Caledonian Stoves offers the best products to meet your needs.
Why Install a Chimney Cap?
Before diving into the Wood burning stove installation process, let’s take a look at why installing a chimney cap is crucial for your wood-burning stove.
1. Prevent Water Damage
Rainwater can enter your chimney if it isn’t capped, leading to damage and corrosion. Over time, moisture can degrade the structural integrity of the chimney, causing bricks and mortar to weaken and potentially crack. A chimney cap acts as a barrier that prevents water from entering and pooling inside the chimney flue.
2. Block Debris and Animals
A chimney cap with a mesh screen can prevent debris like leaves, twigs, and dirt from entering your chimney. It also keeps birds, squirrels, and other small animals from nesting inside the flue, which could block the chimney and create hazardous situations.
3. Enhance Draft and Efficiency
A properly installed chimney cap can help regulate the airflow in your chimney, which enhances the draft and efficiency of your wood-burning stove. This ensures that smoke and gases exit efficiently, keeping your indoor air safe and clean.
4. Prevent Downdrafts
Chimney caps help reduce downdrafts, which occur when external wind forces air down the chimney. This can push smoke and gases back into your living space, posing health risks. A chimney cap helps to minimize the risk of these downdrafts.
Step-by-Step Guide to Installing a Chimney Cap
Now that we understand the importance of a chimney cap, let’s get into the installation process. Installing a chimney cap is relatively straightforward if you follow these steps carefully.
1. Gather Your Tools and Materials
Before you begin, ensure you have all the necessary tools and materials for the job. Here’s a list of what you’ll need:
- Chimney cap (ensure it fits your chimney size and type)
- Screwdriver or power drill
- Measuring tape
- Ladder (preferably an extension ladder)
- Work gloves
- Safety goggles
- Chimney brush (optional for cleaning before installation)
If you’re unsure about the size or type of chimney cap to buy, Caledonian Stoves offers expert advice and a wide selection of chimney caps suitable for wood-burning stoves.
2. Choose the Right Chimney Cap
Chimney caps come in various designs and sizes. It’s important to choose a cap that fits your chimney flue and matches the type of stove you have. Some common types of chimney caps include:
- Single-flue caps: These are designed to cover one flue and are the most common type used with wood-burning stoves.
- Multi-flue caps: If you have multiple flues, this type of cap will cover all of them at once.
- Wind-directional caps: These caps are designed to minimize the effect of wind and prevent downdrafts.
Measure the dimensions of your chimney flue to ensure you purchase the correct size chimney cap.
3. Ensure Safety Precautions
Before heading up to the roof, it’s crucial to take safety precautions:
- Check the weather: Avoid installing a chimney cap on a windy or rainy day.
- Stabilize your ladder: Make sure the ladder is securely placed on flat ground and is tall enough to reach the chimney without overextending.
- Wear protective gear: Use work gloves, safety goggles, and non-slip shoes to prevent accidents.
- Have a spotter: If possible, have someone on the ground holding the ladder for added stability.
4. Clean the Chimney (Optional)
If it’s been a while since your chimney was cleaned, now might be a good time to do so. Use a chimney brush to clear out any soot, debris, or bird nests that could obstruct airflow. Cleaning the chimney will help ensure your stove operates efficiently and safely once the cap is installed.
5. Position the Chimney Cap
Carefully climb the ladder with your chimney cap and tools. Once you’ve reached the top, place the chimney cap over the chimney flue. Ensure that the cap sits securely on top of the chimney and is centered properly.
Some caps are designed to slip into the flue, while others rest on top. Follow the instructions provided with your chimney cap for proper positioning.
6. Secure the Chimney Cap
Once the chimney cap is in place, it’s time to secure it. Most chimney caps come with mounting brackets or screws that attach to the chimney flue or crown. Use a screwdriver or power drill to fasten the cap in place. Make sure the cap is tightly secured to prevent it from being dislodged by strong winds or other external forces.
If your chimney cap has a mesh screen, check that it’s properly attached and covers the entire opening of the flue. This will help keep animals and debris out of the chimney.
7. Inspect the Installation
After the chimney cap is secured, step back and inspect your work. Ensure the cap is firmly attached and the mesh screen is intact. If the cap appears loose or unstable, tighten the screws further or adjust the mounting brackets.
Once the installation is complete, clean up your workspace and carefully descend the ladder. Make sure everything is safely secured before leaving the roof.
8. Test the Draft
After installing the chimney cap, it’s a good idea to test the draft of your wood-burning stove. Light a small fire and observe how the smoke exits through the chimney. If the smoke flows freely and there are no signs of downdrafts, your chimney cap is working properly.
If you notice any issues with the draft, double-check the installation to ensure the cap isn’t obstructing the chimney opening.
Tips for Maintaining Your Chimney Cap
Once your chimney cap is installed, it’s important to perform regular maintenance to keep it functioning effectively. Here are some maintenance tips:
- Inspect the chimney cap annually: Check the cap for damage, rust, or clogs caused by debris or animal nests.
- Clean the mesh screen: If your chimney cap has a mesh screen, clean it regularly to ensure it doesn’t become blocked with soot or leaves.
- Monitor for signs of downdrafts or poor draft: If you experience downdrafts or difficulty maintaining a fire, inspect the chimney cap to ensure it’s not obstructed or damaged.
Conclusion
Installing a chimney cap for your wood-burning stove is a crucial step in ensuring the safety, efficiency, and longevity of your chimney. It helps to prevent water damage, block debris and animals, and enhance the draft of your stove. By following this step-by-step guide, you can install a chimney cap safely and effectively.
For those looking to purchase a high-quality chimney cap or other wood-burning stove accessories, Caledonian Stoves is the best place to explore. They offer a wide range of products and expert advice to help you make the right choice for your home.