A Step-by-Step Guide to Extruder Machine Installation and Setup

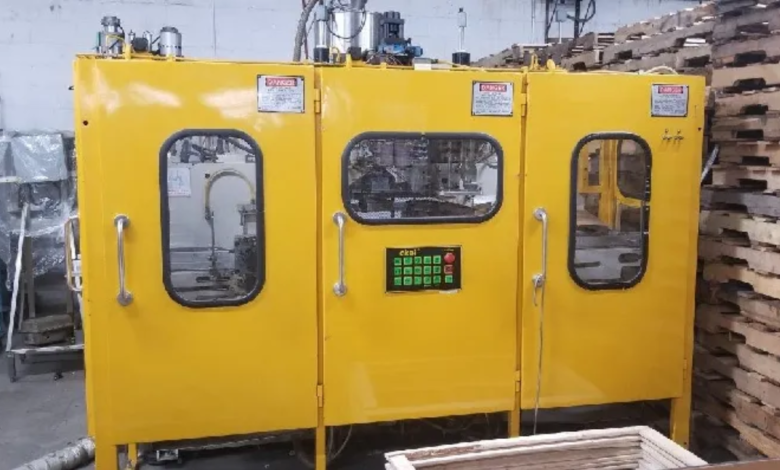
Installing and setting up an extruder machine is a critical process for any manufacturing operation that relies on plastic extrusion. Whether you’re investing in a brand-new machine or opting for Pre-owned Plastic Extruder Machines, proper installation and setup are essential for ensuring optimal performance and longevity. This guide will walk you through the essential steps to successfully install and set up your extruder machine, helping you achieve smooth operations from day one.
Step 1: Preparation and Planning
Before you begin the installation process, thorough preparation is key. Consider the following:
1. Site Assessment
- Space Requirements: Ensure you have adequate space for the extruder machine, taking into account clearance for operation, maintenance, and future expansions.
- Floor Strength: Verify that the floor can support the weight of the machine. Heavy extruder machines require a solid, level foundation.
2. Power Supply and Utilities
- Ensure that the electrical supply meets the machine’s requirements, including voltage and phase. Consult the machine’s specifications to determine the necessary power configuration.
- Check for the availability of air and water supply if your extruder requires cooling systems or pneumatic controls.
3. Tools and Equipment
- Gather the necessary tools for installation, including wrenches, screwdrivers, and any specialized equipment mentioned in the machine’s manual.
4. Documentation
- Review the installation manual and any other documentation provided with the extruder. This will offer insights into specific requirements and procedures.
Step 2: Unpacking and Positioning the Extruder Machine
Once you have prepared the site, it’s time to unpack and position the machine.
1. Unpacking
- Carefully unpack the extruder machine, checking for any damage during shipping. Document any issues and contact the supplier if necessary.
- Keep all parts and components organized, ensuring nothing is lost.
2. Positioning
- Move the machine into position using appropriate lifting equipment or a forklift, if necessary.
- Level the machine using shims or leveling feet, ensuring stability for operation.
Step 3: Assembly of Components
If you purchased a pre-owned plastic extruder machine, it may require reassembly. Follow these steps:
1. Assemble the Hopper and Feed Mechanism
- Attach the hopper securely to the extruder barrel.
- Ensure the feed mechanism is properly aligned for consistent material feeding.
2. Install the Die and Adapter
- Position the die at the end of the extruder barrel, ensuring it is tightly secured.
- Check the alignment with the adapter to prevent leaks or blockages.
3. Connect the Cooling System
- If applicable, connect the cooling water lines to the extruder.
- Ensure all fittings are tight to avoid leaks.
4. Attach Control Panels and Electrical Connections
- Securely connect any control panels or touch screens.
- Follow the electrical wiring diagram provided in the manual to connect the power supply safely.
Step 4: Safety Measures and Compliance
Before powering on the machine, it’s crucial to implement safety measures and ensure compliance with industry standards.
1. Safety Guards and Covers
- Ensure all safety guards, covers, and shields are in place. This protects operators from moving parts and potential hazards.
2. Emergency Stops and Alarms
- Test emergency stop buttons and alarm systems to ensure they are functional and easily accessible.
3. Compliance Checks
- Ensure the installation complies with local regulations and industry standards for safety and operation.
Step 5: Testing and Calibration
Once the machine is installed and secured, it’s time to perform testing and calibration.
1. Initial Power-Up
- Turn on the power supply and initiate a test run without materials to ensure all systems are functioning correctly.
- Observe any unusual noises, vibrations, or error messages, and troubleshoot as necessary.
2. Calibration
- Calibrate temperature controls, feed rates, and other settings according to the material specifications you will use.
- Consult the manufacturer’s guidelines for specific calibration procedures.
3. Test Runs with Material
- After calibration, run a few test batches using the intended materials.
- Monitor output quality, temperature stability, and overall machine performance.
Step 6: Final Setup and Documentation
After successful testing, finalize the setup and document all important information.
1. Final Adjustments
- Make any final adjustments based on test run feedback.
- Fine-tune settings to optimize performance for your specific production needs.
2. Documentation
- Document all settings, calibration details, and any modifications made during the installation process.
- Keep a maintenance log to track service dates, repairs, and part replacements.
3. Training and Safety Protocols
- Train your operators on how to use the machine safely and effectively. Ensure they understand emergency procedures and routine maintenance tasks.
- Establish safety protocols for daily operations to minimize risks and ensure a safe working environment.
Conclusion
Successfully installing and setting up an extruder machine, whether new or Pre-owned Plastic Extruder Machines, requires careful planning, attention to detail, and adherence to safety protocols. By following this step-by-step guide, you can ensure that your extruder machine operates smoothly and efficiently from the outset. Remember that ongoing maintenance and proper training are vital for maximizing the longevity and performance of your equipment. With the right setup, your extruder machine will be a powerful asset in your manufacturing operations, driving productivity and efficiency for years to come.


